“What do I need to do in order to make a blog post go viral?”
I get that question on a regular basis from aspiring bloggers: The answer is complicated and many times uncertain. There are a lot of variables that go into creating viral content, but I’ve been able to find a simple recipe that will give your content the highest probability of hitting the pageview jackpot.
This step by step guide will show you how to make a blog post go viral.
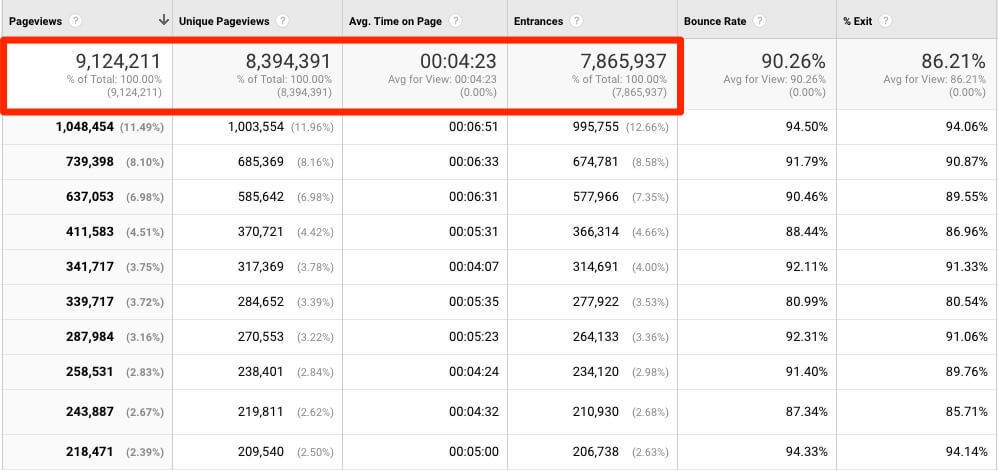
Before I get started, just to assure you that I’m not some hack that is trying to masquerade as someone who has had success with blogging, I took a screenshot of my Google Analytics backend so that you could get an idea of the type of blog traffic I’m talking about.
The fact is that it doesn’t matter what you’re writing about if people don’t read what you wrote. I’ve met with world-renowned professors at their request because so many of them lament the time they put in on an article only to have a handful of people read their work.
They are asking me how to make a blog go viral, or get one of their articles to be read by more people. It’s beyond frustrating to know you’ve got something good, but also know that when you put it out to the public, few people will be aware of it.
Too many writers rely on what they consider an impeccable writing style coupled with unparalleled research skills to get people to read their blogs and articles.
But it’s not an “if you build it, they will come” sort of thing, especially in the age we live in. In order to be well read by people nowadays, you’ve got to blend internet marketing with understandable and valuable writing. That’s the only way to get above the noise.
This step by step guide on how to make a blog post go viral has proven true for me time and time again.
I know it works. I’ve watched it work. It’s repeatable and simple, and I stumbled on it during over five years of trial and error.
Before You Begin, Start By Defining Viral
What the heck does viral even mean? We throw it around as if it has some sort of fixed definition. But viral can mean different things to different people.
If a writer from Forbes publishes an in-depth look at some sort of controversial business deal gone bad and it only gets 200,000 earned views in the first day of the publication, then they may consider it a flop.
But if you write a blog about a topic you’re passionate about and it hits 200,000 people in a day, then you’ll probably be jumping for joy and feeling like a new viral sensation.
“Viral” is relative to the standards of the producer of the content. Start by defining viral for what you’re trying to accomplish.
Step 1 – Choose The Right Topic
Everything hinges on this step. You’ve got to choose the right topic, pair it with the right title, and make sure the thing your writing includes these elements:
- Write about the things you’re most passionate about. (People will only react to passionate writing. You can’t fake it either.)
- Make sure your topic is either super helpful or elicits some kind of strong emotion. (e.g. You’re giving away the algorithm for choosing the winning lottery numbers, or taking a strong position on one of the most controversial issues of our time.)
- You know your topic well, either through experience or through original research.
- You can distill your complex topic into easily digestible and understandable pieces. Remember, the average American reads at a 5th-grade level.)
The length of the piece you write will have a big impact on virality. I’ve found that long pieces usually don’t go viral, and short pieces usually leave people frustrated and wanting more. The sweet spot for me is usually between 800 – 1,400 words for viral posts. If you don’t care about your content going viral, then shoot for longer pieces.
The longer the better for SEO or Search Engine Optimization if the information is useful and relevant. But for the purposes of this blog and making one go viral, stick to about 800 – 1,400 words, and make every sentence count.
Step 2 – Choose The Right Title
This is the step that gives me the most trouble. It’s also the step that will dictate whether anyone ever reads what you write.
Sometimes I spend more time trying to come up with the right title than I do writing the entire blog. The title is everything! It’s what causes people to click and read.
People say “don’t judge a book by its cover.” But every one of us without question will judge a book or a blog or anything else for that matter by its cover. With all of the noise out there in the digital world, if you don’t give people a compelling reason to click on your blog, then all that work you put into it will go largely unnoticed.
It’s sad but true… and I’ve found it to be true almost every time.
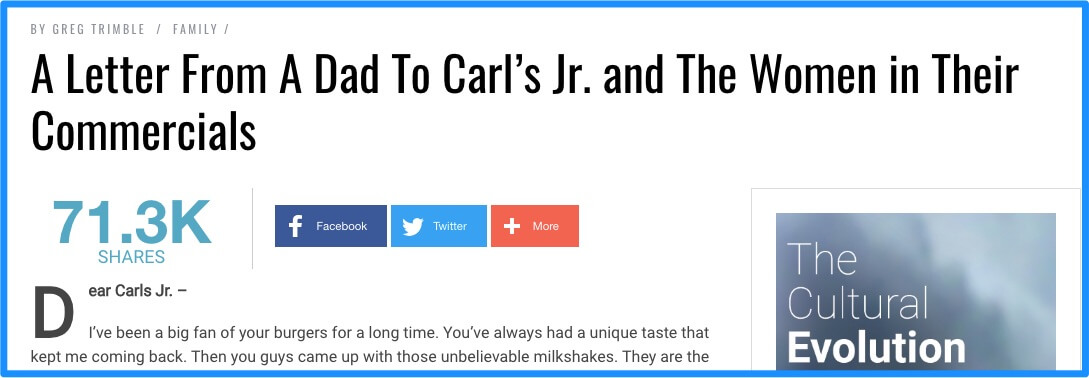
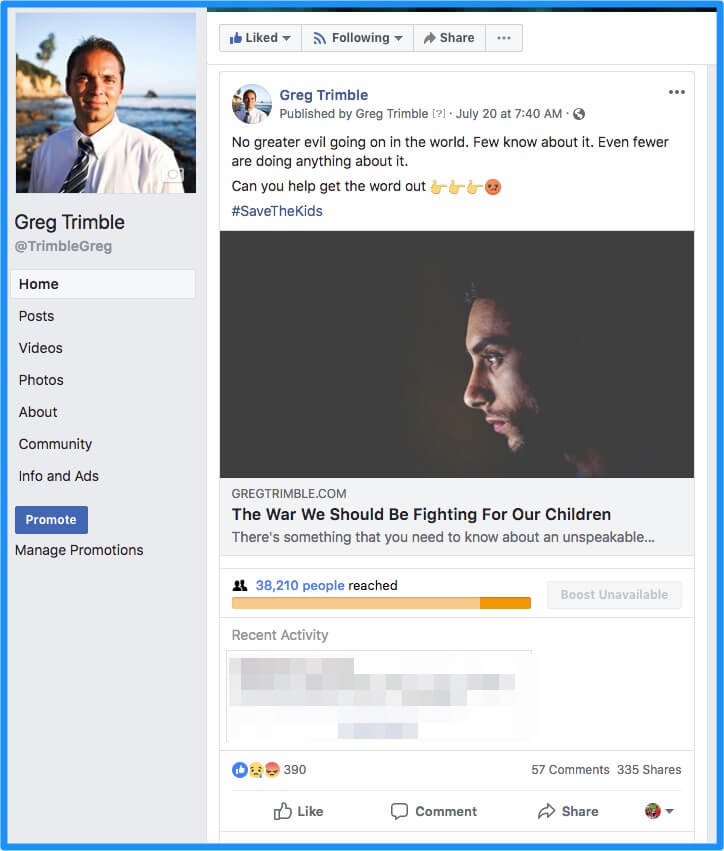
Notice the post above has 71 thousand shares. There were a lot of people who wanted to know what a Dad would be writing to the women in the Carl’s Jr. commercials.
Whether people agree or disagree, it gets people to want to find out what is being said.
The key then is to put a good title together with good content. The perfect storm of a viral post happens when someone picks a relevant and compelling title and then has the content to back it up. If someone has an amazing title that gets people interested but then they let the reader down with the content, the reader will probably never trust your titles ever again.
But when that title peaks their interest and then they find immense value or satisfaction, it builds trust in the writer and causes the reader to want to share it with others.
When readers begin to share, that is the most effective way to make that post go viral.
When choosing the title, make sure:
- The title is relevant to the content and not just click bait to take them to an irrelevant topic.
- The title is as short as possible.
- Causes some sort of emotional reaction. (Happy, sad, angry, etc.)
Step 3 – Choose The Right Images
One of the most overlooked pieces to making a blog go viral is the quality of the images within the blog as well as the featured image.
The featured image or the image that gets shown when you post on social media might be just as important as the title you choose for the blog. You can choose from massive databases of free images that don’t have any copyright restrictions.
Don’t just use Google to find images. It’s likely that you’ll find copyrighted images that could end up getting you sued or costing you hundreds of dollars. Photographers are super protective over their images and some of them are just waiting for you to use one of their images so that they can send you a bill or a lawsuit.
I’ve provided a list of all the Copyright free, commercial and non-commercial use photos you’ll need. There is literally no reason to use a copyrighted image with all that is out there for your selection.
- Unsplash
- Pikwizard
- Librestock
- Gratisography
- PicJumbo
- Startup Photos
- Pexels
- Splitshire
- DeathToStock
- LifeofPix
- IMFree
- Stocksnap
- NewOldStock
- JayMantri
- Travel Coffee Book
- Designer Pics
- Picography
If you absolutely need to have a specific image, and you can’t find the one you’re looking for anywhere else, then you can use Adobe Stock to find more images. Those cost about $2-3 bucks a piece.
I never take this step lightly. Sometimes I search for hours just to get the right image. Just as the title, I’m looking for that image to grab the attention of the reader. When the title and the photo work in concert together, you’ll see much higher engagement with the post.
Again, your primary objective is to give your post a fighting chance in the beginning.
Step 4 – Properly Post On Social Media
Once my blog post is done and I’ve settled on the images and the title, now it’s time to get some eyeballs on the post.
When I first started blogging, I could post the blog on social media and it would be seen by thousands. That was in the days that you could actually boost a post on a personal Facebook account for about $5 bucks and it would show to massive amounts of people.
But of course, times have changed. Now I’ve been forced into a new process.
Before I get started with this process, there are a couple things you should know about social media.
First, Facebook is still the most likely platform for helping a blog go viral. Instagram, Snapchat, Twitter, and other platforms just aren’t great at presenting articles and helping them get shared a lot.
They can be used for many other purposes, but making a blog go viral is typically not one of them. (Unless you’re a celebrity of course.) But… since Facebook owns Instagram, you can also take advantage of Instagram while you’re using Facebook.
So, in order to take advantage of Facebook advertising, you’ll need to set up a what’s called a “Facebook Page” instead of using just your normal personal Facebook account.
Having a Facebook page will enable you to run ads on the blog you’re about to post. This will become important in subsequent steps to making your blog post go viral. (Learn how to set up that Facebook page here.)
Step 5 – Prepare An Email To Send To Subscribers With Your Post
One of the biggest mistakes I’ve made in blogging is to lose out on massive opportunities to get email subscribers.
When my first few blogs went viral, I didn’t have an effective email marketing system in place. I had a blog do around half a million hits in a short amount of time which would have yielded many email subscribers, but because I wasn’t ready for them, they were lost forever.
So prepare your website or blog to have easy email opt-in options. I personally use MailChimp, and then integrate the form capture using their API in order to make it as seamless a possible for the subscriber.
Pro tip: You can’t underestimate the importance of your email list. It is by far the most important asset you will own when it comes to content marketing, publishing blogs, and driving relevant traffic to your site. Social media outlets may change their policies, their algorithms, or their entire business model causing you to lose all of the work you’ve done on their platform. But your email list is yours forever and no one can take that away from you. Grow it and grow it as best you can. It is the secret weapon of all successful bloggers.
When your blog post is ready to go, and you’re preparing an email to your email subscribers, make sure you make that email as functional as possible. This is one of the keys to a higher click-through rate. I make my emails so simple, and so straightforward, it’s almost laughable.

The thing is, I just want subscribers to do one thing and one thing only. Click on the link that takes them to my blog. So I make sure the email name shows it’s coming from me. Not some weird hidden name or entity.
People respond to real people. So the email comes from me. Then I choose a subject line that I think will grab their attention. Sometimes its the title of my blog, and others it’s me just asking the subscriber to “take a look at this…” or “could you help me with this?” or “I’d love to know what you think of this.”
The point is to get the reader to pause and wonder. Pause and wonder whether they are going to miss out on something.
Then, once they’ve stopped on the email to check it out, I make it really easy to read. I address them in a very approachable and friendly way and then pull the most interesting thing out of the blog I wrote in a way that makes them want to read more.
Then I put the title of the blog in big text, with a hyperlink on the text so that you can’t miss the link.
I include a relevant picture in the email and then make sure there are several links that can be clicked on that leads them to my article.
The goal is to make it so that people don’t have to think when they get the email. They’re either not interested, or they’re going to click on the link.
They’ll probably make that decision within seconds, which is why you don’t want to overwhelm them with too much information and make that decision complicated for them.
Step 6 – Publish the Blog, Post on Social Media, and Send Your Email To Your Subscribers At The Right Time
The timing of when you post your blog and send it to your distribution channels is another critical step in the process.
If you decide to post during the middle of the day on a Wednesday, well… good luck. Chances are, no one’s going to see it. From my experience, the best time of the week and the best time of the day to post is either on a Tuesday, a Thursday, a Friday, Saturday, or Sunday. And even at that, Tuesday has rarely been a great day to post.
Most of my viral posts have taken place when I post Thursday through Sunday. The best time of the day to post is either at about 6:30 in the morning so that people see it when they pick up their phone as they struggle out of bed, or at night around 7-8pm when they’re sitting down and trying to relax for the day.
The key is to publish your blog and then post to those distribution channels as close to each other as possible in order to give it the greatest chance of having it be seen by a lot of people in a short period of time.
The more people that see it being shared within that short period of time, the greater the chance that it will hit that critical mass in which people begin sharing it because they see others sharing it as well.
Humans are ofter like herd animals. We do things because of social validation and peer pressure. We don’t like to admit it, but it’s often true.
In case you’re not sure what I mean by distribution channels, I’m talking about any medium through which you can get eyeballs on your post.
Email, push notifications, Facebook, Instagram, Twitter, Linkedin, Reddit, and any others that might be relevant to your audience. Don’t be afraid in the beginning to reach out individually to friends and ask them to read it and interact with the post.
One of the great secrets of the most popular bloggers on the internet is that they “do things that don’t scale” in order to get started. Meaning, they put in a lot of manual effort to interact with and show interest in other people along the way.
They are constantly helping others, and it’s been said that if you help others get what they want, then they will help you get what you want. The more interest you show in others, the more interest others are going to show in you.
If you’re serious about blogging, I would also strongly consider throwing a few dollars behind your post to promote it to your target demographic.
Facebook shows your post to virtually no one unless you promote the post. So take $20 bucks and get the ball rolling to encourage organic sharing.
Step 7 – Encourage Blog Interaction
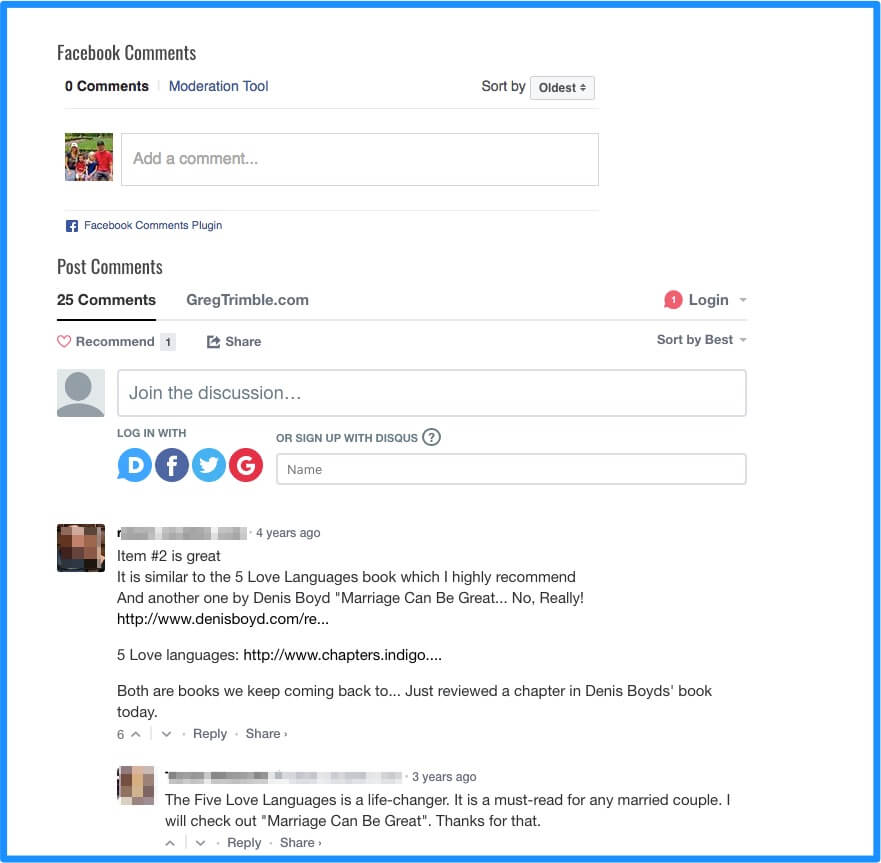
Make sure you have comments enabled on your blog (which is a topic for another blog) in order to make it easy for others to interact with your blog and share their opinions.
Don’t censor opinions that disagree with what you’ve written. Let them be fuel to the conversation.
I use Disqus and Facebook embedded comments to give people various ways and means to make their voices be heard. When a post is getting a lot of interaction, it sends signals to Google and other search engines that cause the post to get picked up in trending areas or rank higher organically.
As a way to give the blog post another push, you can send a follow-up email to your subscribers.
When you send an initial email to your subscribers, keep in mind that a good majority might not even see the email. It may get buried in all of their other emails, or they just didn’t have the time to look at it when you initially sent it.
So here’s another little secret. Inside your email marketing system, there will be a way to segment subscribers that did not open or click on the email and then send them another email. Since they didn’t see or open your initial email, it won’t be annoying to them or be considered spam. It gives you a second shot to get that email in front of people that might have just missed the first one. I usually wait a day or two before sending that second email.
Pro tip: A not so well known method of acquiring blog subscribers is to gather site visitors into a push notification service. I use One Signal on my blog and it does a wonderful job at gathering people into a list based on a “cookie” (piece of code/script) that is left on that user’s browser. Here’s what it looks like when someone visits my site who has never previously visited my site:
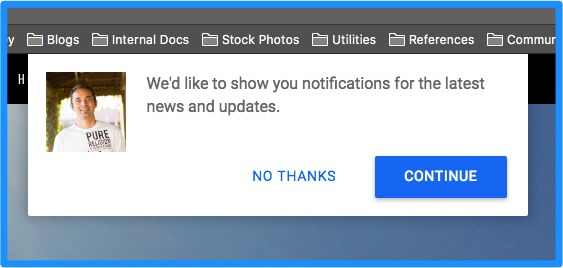
You’ll notice that a simple box shows up and asks them permission to notify them of future posts. They can either accept or reject. Many people will accept at a much higher rate than when trying to get them to sign up for email newsletters.
I am also continually building my remarketing lists. I use Adroll because of its ability to target people on Facebook. But you can use Google Ads or any number of other retargeting softwares as a service. (If you ever do use Adroll, we’ve created a photoshop template to help you create ads for all of the required sizes. It’ll save you a bunch of time.)
Remarketing lists will enable you to present targeted ads to people based on the page that they landed on.
So if you were writing a book and you wanted anyone who came to your site to see an ad for your new book, it’s an easy way to bring them back to your site and make them aware that your new book has been released.
Step 8 – Repurpose Your Content
It’s common to watch a blog post go viral only to have very few people ever visit that page again. You’ll see some residue traffic for a few weeks after your post goes viral, but then it’ll drop off dramatically. But that’s to be expected when it comes to viral content.
Viral content is meant to be eye-catching, quick-hitting, and optimized for clicks versus optimized for long-term value. But, that doesn’t mean it has to stay that way.
One thing I’ll do once a viral post has run its course is go back in and quickly change the title. If that means changing the URL structure then don’t forget to 301 redirect the old URL to the new URL. But you can “search engine optimize” that piece of content and turn it into what is called “Evergreen Content” for long-term search engine rankings just by making a few small tweaks.
That page will naturally rank because it’s probably gained some backlinks and had a lot of traffic. Those are things that the search engines always smile upon.
Step 9 – Monitor The Process
I have a Google Analytics app on my phone so that I can watch the traffic spike. You may need to adjust your server resources if the blog is a hit. I also monitor when people mention the blog or me by name by using a service called Mention.
You can also use Google Alerts. I want to know if other people are giving the blog some attention so that I can reach out and thank them.
At the end of the day, you should have a purpose for wanting your blog to go viral. Usually, that purpose has to do with building a business, promoting a cause, or standing for something you believe in.
The way to gain ongoing traction for your purpose is to build a tribe. So it’s important to stay close to the people who are showing interest in the things you’ve written.
I’m sure I’ll add to this guide in the future, but for now, I’ve given you my step by step guide on how to make a blog post go viral. It’s a fairly simple process but can be disappointing if it doesn’t work after you put in such hard work.
The most important advice I can give you is to be persistent, consistent, and to learn from your mistakes. It takes time. No content creator nails it on their first go around. At least none that I know of.
So best of luck to you, and let me know if there is anything you’d like me to dive into further!